

There’s something strange but nice about getting into a clean vehicle. The steering wheel feels better, the driving feels more relaxed, and even the same old commute feels a little less tedious.
If you’re determined to keep things neat and tidy but don’t know where to begin, then these car cleaning tips will ease you gently into a simple, realistic routine that achieves professional-looking results without the need for a full detailing rig in your garage.
Get the details on smart ways to rinse the outside, deep-clean the inside, glass, and upholstery, and create a low-effort routine to keep it fresh longer than the weekend. Consider this a gentle push from a fellow chip-lover who, months later, discovered a crisp packet wedged under a seat.
Start With The Big Picture: A Simple Cleaning Plan
Before getting lost in products and techniques, it helps to think in terms of zones: exterior, interior, and glass. Most guides from car-care pros recommend working from the top down and from cleanest to dirtiest areas, using dedicated tools for each part to avoid cross‑contamination.
A good basic sequence:
-
Exterior wash and dry
-
Wheels and tires
-
Interior de-clutter and vacuum
-
Dashboard, console and plastics
-
Upholstery and carpets
-
Windows and mirrors
Professional detailing guides stress using microfiber cloths, gentle cleaners, and methods like the two‑bucket wash to reduce paint scratches. You don’t need fancy gear for a huge improvement; a thoughtful order and a handful of decent tools go a long way.
Exterior Care: Washing Without Scratching
The outside of your car takes the brunt of weather, road grime and bird droppings. Done badly, washing can actually damage the paint; done properly, it dramatically improves how the car looks and how long the paint lasts.
Use The Two-Bucket Method
Many car-care experts recommend the two-bucket method to minimize swirls and scratches. The idea is simple:
-
One bucket holds soapy water (wash bucket).
-
The other holds clean rinse water (rinse bucket), ideally with a grit guard.
You:
-
Rinse the car thoroughly to remove loose dirt.
-
Dunk your wash mitt in the wash bucket and clean a section from top to bottom.
-
Rinse the mitt in the rinse bucket, rubbing it against the grit guard to release dirt.
-
Reload with soap and repeat for the next panel.
Guides emphasize washing out of direct sunlight, rinsing thoroughly, and drying with clean microfiber towels to avoid water spots.
Don’t Forget Wheels And Tires
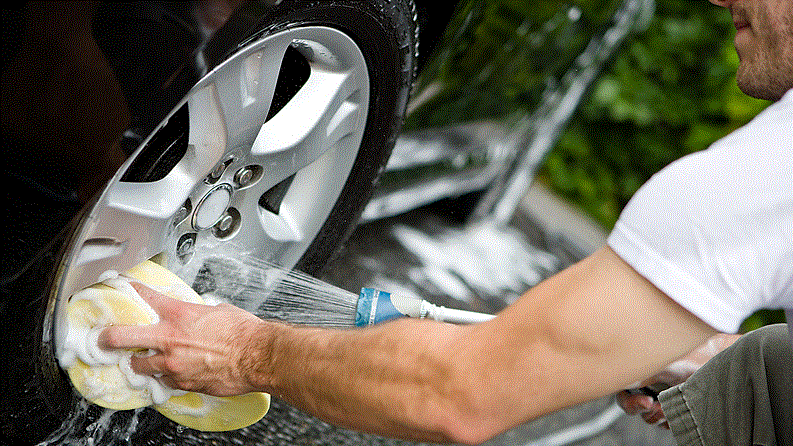
Wheels collect brake dust, tar and road grime, so clean them with separate brushes and cloths. Many exterior guides suggest using a dedicated wheel cleaner, agitating gently with a soft brush, and rinsing thoroughly before moving to the bodywork. Using separate tools here stops harsh particles from scratching your paint later.
Quick Exterior Tips
-
Use car-specific shampoo, not washing-up liquid, which can strip wax.
-
Always wash from top to bottom, so dirty water doesn’t run over freshly cleaned panels.
-
Dry with microfiber towels rather than letting the car air-dry.
Interior Basics: De-clutter, Then Vacuum Properly
Interior cleaning feels less overwhelming if you strip it back first. Many professional guides start by removing everything that isn’t bolted down: rubbish, reusable bags, child seats (if practical), and floor mats.
Step 1: Clear The Clutter And Mats
Car interior cleaning guides recommend:
-
Removing all rubbish and personal items, including door pockets, console and boot.
-
Taking out floor mats, shaking them to remove loose debris and setting them aside for separate cleaning.
Cleaning mats early gives them time to dry while you tackle the rest of the cabin.
Step 2: Vacuum Everything
A strong vacuum with attachments makes the biggest difference inside. Pros suggest starting at the top and working down, so dust falls onto areas you haven’t yet cleaned.
Focus on:
-
Carpets and under seats
-
Between seat rails and center console
-
Door pockets, cup holders and the area where the dash meets the windscreen
Car-care resources often note that handheld vacuums alone may not have enough suction; a plug‑in unit or a car wash vacuum can save time and do a better job.
Dash, Console And High-Touch Surfaces
Once the crumbs and grit are gone, you can tackle dust and grime on the dash, console and other hard surfaces.
Use The Right Cleaners And Cloths
Guides from car magazines and detailing brands generally recommend:
-
Starting with a dry microfiber cloth or duster to remove loose dust from the dashboard and vents.
-
Using a mild, low-residue cleaner on plastics and vinyl, applied to a cloth rather than sprayed directly to avoid over spray.
-
Avoiding bleach or harsh household products that can discolor or crack interior materials.
High-touch areas like the steering wheel, gear lever and door handles benefit from a cleaner with light disinfecting properties, but always check labels to ensure they’re safe for automotive surfaces.
Small Tools For Awkward Spots
Detailing guides often suggest using:
-
A small paintbrush or soft toothbrush for vents, seams and tight crevices.
-
Cotton buds or detailing swabs for logos, buttons and small gaps.
You don’t have to be obsessive – just enough to remove the obvious dust and stickiness that make a car feel neglected.
Upholstery And Seats: Fabric vs Leather
Seats take a lot of abuse from daily use, food, drink and pets. Cleaning approaches depend on whether you have cloth or leather.
Cloth Seats And Carpets
Interior detailing guides recommend a step-by-step approach:
-
Vacuum thoroughly first to remove as much debris as possible.
-
Spot-treat stains with an appropriate upholstery cleaner or stain remover, following instructions carefully.
-
Apply a general fabric or upholstery cleaner over the seat, using a soft brush to work it into the material.
-
Wipe away residue with a slightly damp microfiber cloth, avoiding soaking the foam underneath, which can promote mold.
For carpets and floor mats, a mix of vacuuming, dedicated carpet cleaner and gentle scrubbing usually does the trick. Some guides suggest using a degreaser on rubber mats, rinsing thoroughly and allowing them to dry outdoors.
Leather Seats
Leather needs different products and a bit of restraint. Many expert guides advise:
-
Wiping seats with a leather-safe cleaner using a microfiber cloth, avoiding harsh chemicals.
-
Using a soft brush for creases and stitching if needed.
-
Following up with a leather conditioner to keep the material supple and reduce cracking over time.
Always test products in a hidden area first to check for colorfastness, as many interior guides warn.
Glass And Screens: Clear Views Without Smears
Smudged windows and smeary infotainment screens make even a clean car feel grubby. Fortunately, they’re quick wins if you use the right products.
Cleaning Windows
Car-care sources recommend alcohol-based glass cleaners that are safe for automotive glass, applied with microfiber cloths. A typical method:
-
Spray the cleaner onto one cloth rather than directly onto the glass to avoid over spray.
-
Wipe the glass with this cloth, then use a second dry cloth to buff to a clear finish.
-
Clean inside and outside, using different wipe directions (for example vertical inside, horizontal outside) so you can easily see which side any streaks are on.
Touchscreens And Instrument Panels
Most manufacturers recommend avoiding ammonia-based cleaners on screens. Detailing advice suggests:
-
Using a damp microfiber cloth with a tiny amount of isopropyl alcohol or screen-safe cleaner.
-
Wiping gently in straight lines rather than circular scrubbing.
Take care not to press too hard, especially on older displays.
Keeping It Fresh: Odor Control And Maintenance
Once you’ve done the hard work, a few small habits keep your car smelling and looking better for longer.
Simple Habits That Make A Difference
Interior maintenance guides often highlight these basics:
-
Keep a small rubbish bag or container in the car and empty it regularly.
-
Avoid eating messy foods in the car when you can; if you do, remove rubbish at the next stop.
-
Do a quick mini‑clean every couple of weeks: shake mats, quick vacuum, wipe down the dash.
It doesn’t have to be perfect – consistency matters more than intensity.
Dealing With Smells
For stubborn odors, car-care articles suggest:
-
Sprinkling bicarbonate of soda on carpets and fabric seats, letting it sit, then vacuuming it up.
-
Using activated charcoal or odor absorbers tucked under the seat.
-
Addressing the source (for example damp mats or a spill) rather than just masking it with strong air fresheners.
One writer joked that after finally cleaning the spilled coffee under her seat, “it was like driving a different car – same petrol bill, much nicer place to be.”
Pros And Cons of DIY Car Cleaning vs Professional Detailing
You don’t have to choose one forever; most people mix at‑home cleaning with occasional professional detailing. But it’s worth weighing up both.
DIY car cleaning pros:
-
Cost-effective: You pay mainly for products and your time.
-
Control: You decide how thorough to be and what products to use.
-
Frequency: Easier to keep on top of small messes between bigger cleans.
DIY car cleaning cons:
-
Time and effort: A full clean can easily take a couple of hours.
-
Learning curve: Using the wrong products or techniques can damage finishes (for example harsh cleaners on leather or glass).
-
Equipment limits: Without machines like steam cleaners or extractors, some deep stains and odors are harder to tackle.
Professional detailing pros:
-
Deep cleaning tools and techniques (steam, hot water extractors, machine polishers).
-
Experience with tricky stains, smells and paint defects.
-
Time savings – you focus on other tasks while the car is cleaned.
Cons:
-
Higher cost, especially for full interior and exterior packages.
-
You still need to maintain the car between visits to keep it from sliding back.
For many drivers, the sweet spot is a solid DIY routine with occasional professional visits for deep work.
Actionable Car Cleaning Tips You Can Use This Week
To make these car cleaning tips more than good intentions, here’s a short, practical list you can actually act on.
-
Pick one day this week to do a basic clean: empty rubbish, remove mats, vacuum, wipe dash and clean windows.
-
Buy or gather a small kit: car shampoo, two buckets, wash mitt, microfiber cloths, an all‑purpose interior cleaner and a glass cleaner.
-
Try the two-bucket method for your next wash – it’s a simple upgrade that helps keep paint looking better.
-
Set a recurring reminder every two to four weeks for a quick interior reset (mats, vacuum, wipe surfaces).
Once you’ve done this two or three times, it stops feeling like a project and starts feeling like a normal part of looking after your car.
Conclusion: Make Your Car A Nicer Place To Be
Having a clean car makes it much easier to take photos with the car and to spend time in it. Using some clever car cleaning advice, a few microfiber cloths, and a little consistency, you can make your car more “freshly detailed” than “mobile storage unit” for most of the year.
Always go for the best. It may start with one ‘focused’ session this week – wash, vacuum, wipe the basics – and then build on small habits that stop the spillage. In the future, you will appreciate making it a habit to get into a clean car on a busy morning.
